Choose The Right Power Meter
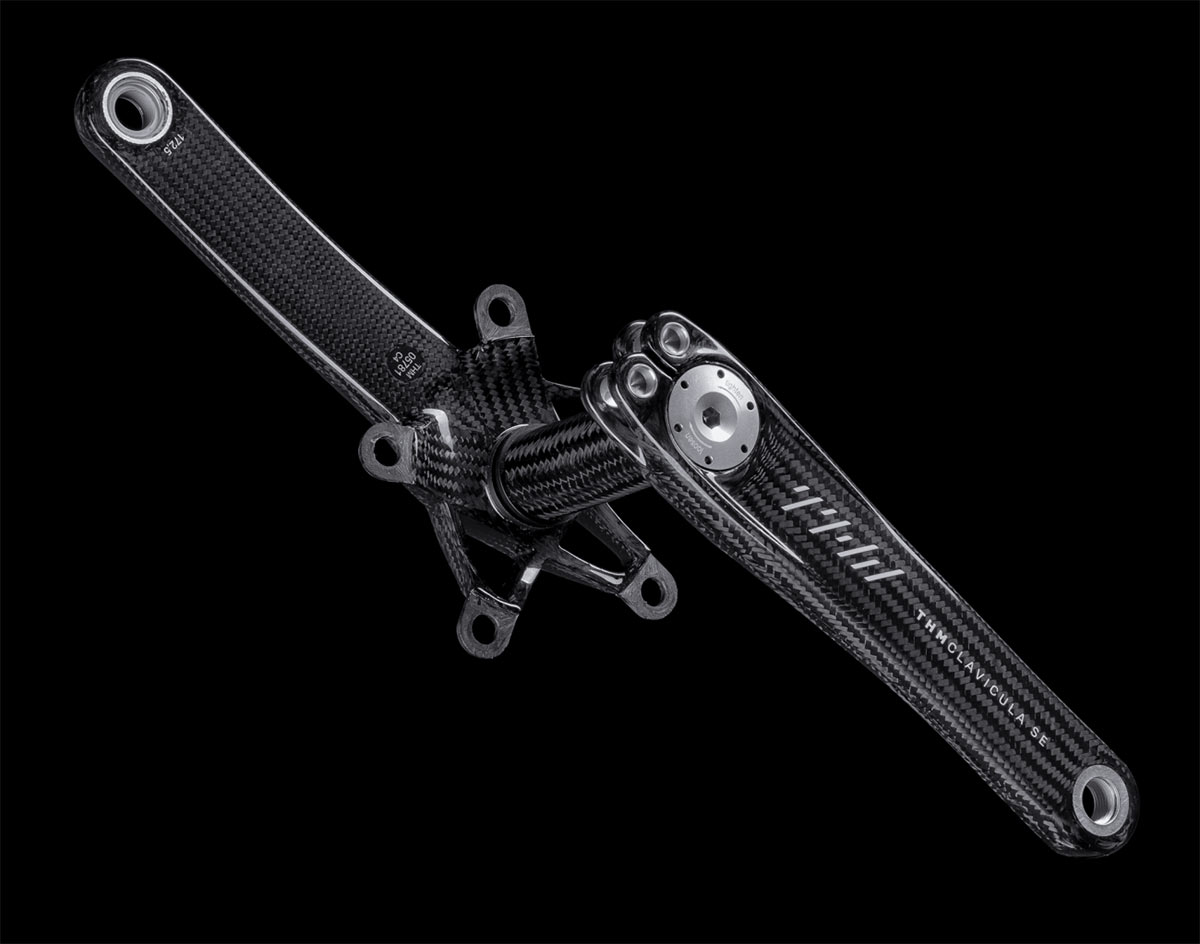
A power meter is an irreplaceable tool for any cyclist who wants to train efficiently and measure their performance correctly. Think about the cycling discipline you practice the most, whether it is road cycling, mountain biking or triathlon. Then, choose the power meter that aligns best with your practices. The options range from crank-based systems that are known for their high accuracy but often require professional installation to easy-to-use pedal-based meters that you can switch between bikes.
Installation and Calibration
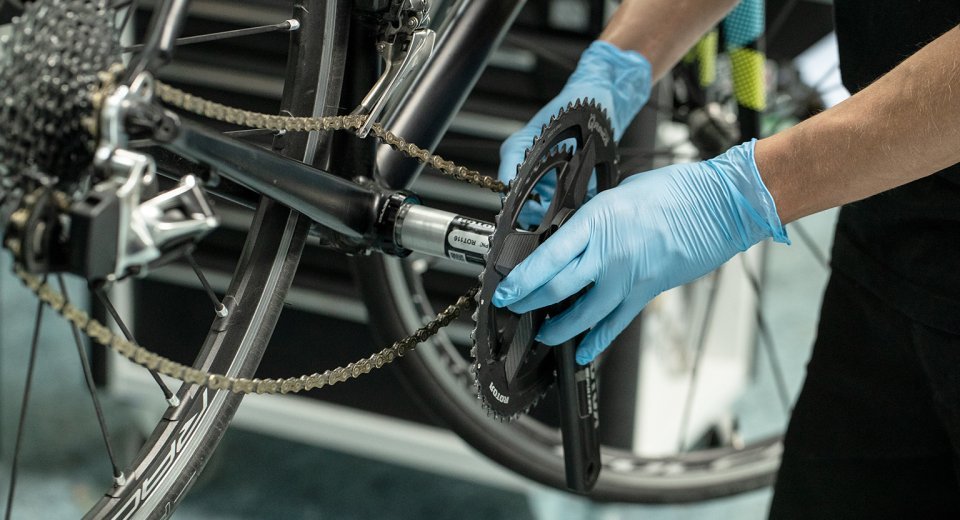
Installation is crucial for accuracy of the readings. Be attentive to the guidelines provided by the manufacturer. More complex models, such as crank-based power meters, might require professional installation to ensure that the crankset is precisely aligned with the bike’s bottom bracket. At the same time, calibration is another indispensable aspect. To ensure your data is accurate, you need to perform a zero-offset calibration before each ride. It helps adjust for changes in the temperature and mechanical setup.
Learning to Read the Data
Once you adjust to the numbers displayed on your cycling computer, you will start changing the way you ride. Pay attention to the metrics such as the average power and peak power and track your power balance over time. The numbers should guide you in making changes to your training intensity and duration. For instance, maintaining a relatively constant power output measured in watts during interval training will help you build endurance and strength.
Utilizing Power Data in Training
Riding with a power meter is not enough if you want to improve your performance. Create a set of workouts targeting your critical power areas, your Functional Threshold Power or the average power you can sustain for an hour. It refers to the power zones, with defined range of watts, that allow you to target different aspects of your performance, from endurance to sprint power and neuromuscular power.
Analyzing Performance Over Time
Your training records should show the changes in your power numbers over time, in weeks and months. Some apps and devices can show you how your power data correlates with the heart rate to give you an idea of somewhat accurate analysis of your performance and fitness improvement. Look for the signs that you get stronger: are your power outputs increasing at a similar heart rate readout?
Installation and Setup
Installing a single-sided power meter should be a relatively quick and easy process. Begin by making sure that your bike, as well as the power meter, are compatible. Check the device’s manufacturer for crank arm compatibility; as an example, if you have a Shimano crankset, choose a power meter like the Stages Power Meter that would be specifically designed for that component.

Attaching the Power Meter
First, you should remove the left crank arm. You will need an Allen key or possibly a crank puller, depending on your bike’s model. In the place of the removed piece, attach the power meter’s crank arm. Torque it down to the manufacturer’s specifications, which would usually range from 12-14 Nm. An incorrectly torqued power meter would not only provide skewed readings but could also be permanently damaged.
Pairing with Your Device
After attaching the power meter, you need to pair it with the cycling computer or the smartphone application. Turn it on and initiate the pairing mode; the power meter should appear in the list of sensors. This might be achieved by pressing a special button on the power meter, or merely by pedaling for a few seconds to turn it on. During the pairing, the two devices will exchange information and make sure to form a connection.
Calibration for Precision
After pairing with the device, you would likely have to calibrate the power meter. Complete the zero-offset calibration; that sets the power meter to understand a zero force that is essential for creating accurate measurements. You would likely have to perform this process before every ride as the readings can be affected by changes in temperature and other aforementioned variables.
Test Ride
Finally, after installing the power meter, calibrating it, and turning it on, take a short ride to confirm that everything works. The power output readings that appear on your device should remain stable and predictable based on your pedaling. If they are going up and down, you would have to torque the power meter better or repeat the calibration process.
Understand Basic Output Data
Obtaining and appropriately interpreting basic output data from a single-sided power meter could greatly increase the efficiency of training. In general, you should focus on watts, which is a direct measure of power output. This is what you see on the screen of your device, permitting you to assess how much energy you are exerting at any given point at time. One of the most straightforward metrics is the watts in this regard; if you are putting out 250 watts, you are using 250 joules of energy.
Average Power and Training
Monitoring your average power over the course of the ride, you can estimate the overall amount of effort. This is especially important if you are using power meters for purposes of endurance training since maintaining a consistent average power is vital.
Understanding Power Zones
Power zones are important when it comes to structured training. They are typically divided into zones for recovery, endurance, tempo and threshold, and anaerobic power. Staying in the ‘tempo’ zone, roughly constituting about 76-90% of your FTP, increases muscular endurance . Regular analysis and data tracking on biking apps would help you to stay abreast of the latest trends and offerings of online courses.
Cadence and Power
A major point of variable which must be accounted for, is the cadence, or how fast your pedaling. When you are in a lower gear pumping faster spikes and falls in power output become less wide. Thus higher cadence that you adopt, less fatigue of muscles you are subjected to. This enables you to ride longer stretches.
Perform First Calibration
Introducing the first calibration on your single-sided power meter plays a significant role in making the performance data from your rides more accurate. Such a type of calibration determines the determination of the zero offset, ensuring that the efforts not related to pedaling are not measured.
Calibration Procedure
On a stationary and stable surface, place your bike and ensure it will not glide. You should be making no load onto the pedals. Access the calibration function of the power meter through your bicycle computer or an application supported by your phone. Select calibrate or a similar option as zero offset.
Ensuring the Accuracy of the Performance Data
Initiate the calibration, and the apparatus will tell you to strike down the cranks four times and then let them go. Your task is to check if the power meter will be determining that it counts zero watts while there is no power going through it. This would mean that the device does not count forces impacting the pedals during their rest or other outside forces such as gravity.
Frequency of Implementation
It is advised to calibrate for each ride as the conditions of performance might change, such as the temperature outdoors and hence the accuracy of the determination. It will let you monitor your progress accurately.
Checking if Calibration is a Success
Following the described procedure, try to conduct a short test and pedal lightly and constantly. While doing that, you should be seeing the power report indicating the low scale. If it does go higher, calibrate it once more or contact the manufacturer of the power meter for further support.
How To Read And Analyze Data
Reading and analyzing data from a single-sided power meter correctly is vital for optimizing the process of cycling. Understanding how to interpret the data and what the numbers mean can help adjust the training routine and implement some changes. The present paper will provide a guide on how to interpret the data taken by the meter, track essential metrics, and use the results acquired to improve training.
Key Metrics to Focus On
Average power: this measure helps a person understand how much effort he or she put into a ride. It is reasonable to develop one’s capacity to produce bigger numbers for a shorter period of time.
Peak power: this metric indicates the highest power developed during the workout or a specific period of time. This metric typically increases when a person trains in intervals or does sprinting.
Normalised power: it is necessary to control this metric because it can provide a clear vision of one’s exertion in case of abrupt changes in terrain or other difficulties. As a result, this metric will be slightly higher than one’s average power.
Intensity factor and training stress score also need a close look.
Graphs to Analyze
There are several graphs that can be developed to evaluate one’s work and see where maximum effort was provided and whether power was maintained properly. One of such graphs shows when and where a person was developing his or her maximum efforts. It is also useful for analysis to have some graphs where the power curve is overlaid with elevations.
In a similar manner, it is possible to compare one’s power curve with cadence to see how well it was maintained and what difficulties occurred.
You should also check how the ride was transferred to the graphs on the stationary bicycle and whether power was produced well.
How to Apply to a Training Plan
Look for trends in average power developed at a similar level of heart rate. Reread the post from the blog about my best mtb helmets. See if your power is increasing and you find it easier to maintain while riding. This observation will help to understand how resistant you are and discipline basic exercises — push-ups, pull-ups, press, and squats. Send these simple exercises for the back on the examination to your training program. Strava, TrainingPeaks, and other software help analyze data more properly and find information on how you were riding, where you overpowered or underpowered, and the power you maintained or failed to maintain. These data can be used to see where one’s time was spent and understand whether it was necessary. Find the point where the big change occurred and the most effort was provided.

In conclusion, it is necessary to state that there are several steps to be followed to read the data from a single-sided power meter and draw a proper conclusion afterward. Such steps are identification of key metrics that should be tracked and analyzed, graphs to be created and analyzed, points of comparison with the acquired results, and specific-training plans to implement.
Dealing With Common Erroneous Readings
Talking about performance history, data saturation means that you are not able to write any more files to your computer or disk space, and your computer simply stops writing data. Since the device cannot record information any more, new data and pages not open properly. There are various ways to remove the data saturation.
Low Battery Power
One common error is low battery power. When accessing data using a power meter, have you ever used one? If not, you need to know that there is a possibility that when the battery is dead halfway through reading the information, it will come back on and show you abnormal or inconsistent data thinking that the activity has started. Thus, always ensure that the battery is in good condition. To avoid such errors, the solution is to ensure that ample information is not provided and that the meter displays the power generated. It will prompt the software to re-launch or restart.
Calibration Mistakes
Another error that occurs is calibration problems. There are many ways to avoid the common mistakes. Always ensure the power reader is properly attached. Get readings from the power meter, do the installation step on the bike, and then remove it and take the second step. By releasing or removing the device, the handle moves smoothly to the side where it touches the peculiar tool. So, when you are riding to the top, the meter must test that low watts are which indicators are used properly. If you want to reinstall, follow the same procedure. Do another 20-minute assessment. Its readings shall not exceed 40 watts. Due to the incorrect calibration of the battery when the unit is first turned on, it is burning energy values way too high.
Maintenance and Routine Inspections
Both the maintenance and routine inspections of your single-sided power meter are vital for it to last for a longer time and function effectively. Checking up on and servicing your power meter on a regular basis can save you a lot of time and nerves during those crucial rides or races. As a result, both cleaning procedures, battery replacement routines, and firmware updates, as well as torque checks are needed to make sure your power meter is in the best state possible.
Cleaning Procedures
Your power meter has to be as clean as possible. Thus make sure you clean your power meter, especially after your rides in wet or muddy conditions. The dirt and grime may interfere with its mechanical components, so it’s better to use a soft damp cloth when wiping down the crank arm. Also make sure there is no grit or anything else lodged around the power meter to remain on the safe side. That way you may help ensure no water will be forced into the wrong place. Specifically, do not use any high-pressure water jets and also avoid using any cleaning products.
Battery Replacement Routine
Make sure to check and replace the battery with another one periodically. With a lot of power meters that is indicated when the battery runs low on charge, but it’s better to replace it with a new one either at the beginning of every season or after every roughly 500 hours of riding, whichever will come first to prevent a situation with it dying mid-ride.
Firmware Updates
Make sure to check for any available firmware updates. Just as with any other electric device, your power meter will have certain software running inside of it to make it work. It is frequently updated with fixes of any possible bugs that there are, making your power meter more accurate and reliable, as well as often adding some extra functionalities. Make sure to check for the updates on a regular basis and install them as they are published to keep using your power meter efficiently.
Torque Checks
It is a well-known fact that anything that can possibly loosen will do so over time. On the device like a power meter that is constantly vibrated and pushed with a force that is initialized to make a precise reading that fact is even truer. Make sure to check the devices’ torque using a torque wrench and comparing it to the manufacturer’s specifications. Make sure to do this regularly to make sure no slippage of any kind will occur, thus keeping your device functioning properly and providing accurate measurements all the way.
Professional Inspections
Although both the cleaning procedures and torque checks can be done at home, a yearly check by professionals can always come in handy. They can provide additional report and calibration data that is impossible to get from a do-it-yourself maintenance and checking up.


