Maximize your Stages Power Meter’s accuracy and performance by properly installing, pairing, calibrating before rides, monitoring data, and maintaining it with regular cleaning and updates.
Install the Stages Power Meter Properly
Preparation and Tools
You need a torque wrench, Allen keys, and any tool specific to your bike’s crank arm. Also, you need a clean workspace with ample lighting. Then get started by removing the existing crank arm. This will typically involve an Allen key to loosen the bolts. Carefully slide off the crank arm from the spindle to avoid damaging the gears. If you’re not sure, you can refer to the bike’s manual on how to remove the crankshaft specifically.
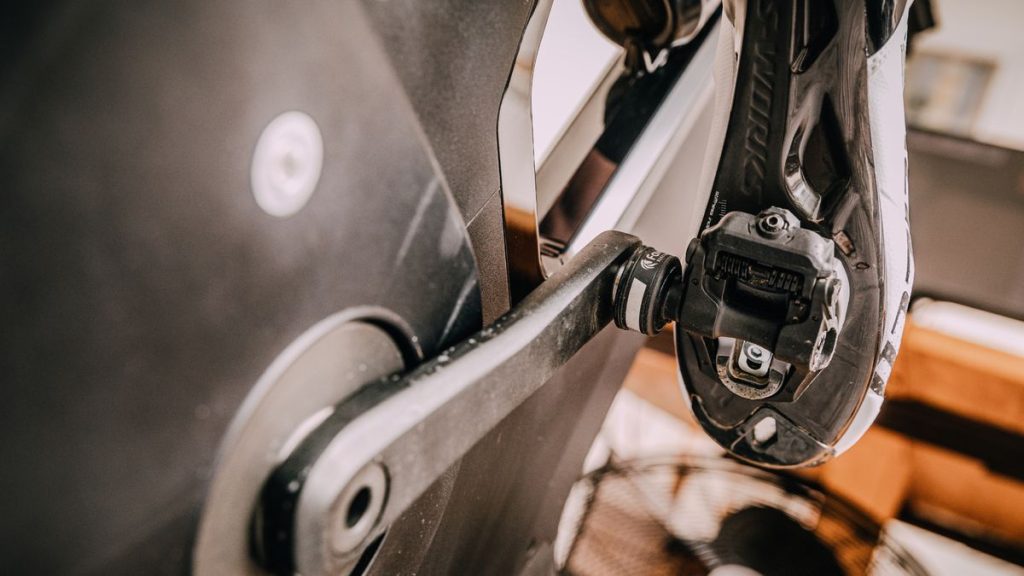
Attach the Stages Power Meter to the Crank Arm
Here you must place the power meter on the crank arm spindle and align it well before tightening. Tighten the bolts to the manufacturer-recommended torque specification using a torque wrench. An overtightened power meter may affect its performance, while an under-tightened one may fall off and jeopardize your safety.
Connecting and Calibration
Once installed, establish a connection between the Stages Power Meter and your cycling computer or app using Bluetooth or ANT+. Pair according to Stages Cycling instructions and make a first-time calibration.
Testing and Final Adjustments
Finally, take your bike for a test ride after ensuring everything is in place. If there’s no noise and everything is secure on the bike, then calibrate the power meter again. This ensures power data received is always accurate.
Pair with Your Cycling Computer or App
Ensure Compatibility
Before pairing your Stages Power Meter, make sure your cycling computer or app supports connections via Bluetooth or ANT+. Most modern cycling computers such as Garmin, Wahoo, or apps such as Zwift are made to support these connections. It is important to check the specifications to locate safe integration. Check that the device meets Stages Performance Power Meters requirements. Ensure the Stages Power Meter is compatible with Stages Link. It is advised to use the latest bike computer firmware to avoid any possible glitches.
Activate the Power Meter
To activate the Stages Power Meter, you will need to turn the Stages Power Meter on. Spin a crank arm to wake the power meter. The LED indicator will start to flash. If the LED indicator doesn’t flash or merely shines in constant red, the problem may be in a low battery. You may need to replace it.
Start Pairing Process
Go to your cycling computer or app settings menu. Open a new sensor/device and find a power meter. Allow the device time to search for a nearby power meter. When you see the Stages Power Meter on the list, press it to start the pairing. The process takes approximately 30 seconds.
Confirm Connection
After the power meter has been paired, check whether the connection was successful. Look if the sensor displays power on your cycling computer or app. If your idle device detects power from the sensor, you can ride. Otherwise, repeat the process again. To be certain, pedal, and check whether power data is adequate.
Calibration for Accuracy
Once the technology has been paired, a calibration is required for accurate readings. Go into the calibration power meter in your cycling computer. Follow all calibration instructions appropriately. Calibration is essential and should be done regularly (ideally each time before riding).

Calibrate Before Each Ride
Why Calibration Matters
Calibrating is the only routine that enables your Stages Power Meter to generate correct and consistent power data. In the absence of regular calibration, circumstances such as adjustments to mechanical procedures and changes in temperature will likely cause the Stages Power Meter to function inaccurately.
How to Prepare for Calibration
- Ensure the bicycle is positioned on a level surface.
- Verify that the power meter is awake. To activate the meter, rotate the crank arm a handful of times.
- Ensure that your biking computer or application is open and connected to the power meter.
Calibration Process
- Locate your biking computer or application’s calibration choice. On most gadgets, this is accessible from the settings or “sensors” submenu.
- Activate the Stages Power Meter from the catalog of connected sensors.
- Stick to the on-screen instructions to begin the calibration. This generally entails placing the crank arm in a predetermined position, typically perpendicularly.
Completing Calibration
- You will need to use your device to reveal the power meter to perform the zero offset. The calibration will generally take only a few seconds.
- Look out for a warning on your device indicating that the calibration has been completed. If not, continually repeat all the procedures ensuring that all the steps are followed.
Check Calibration Achievement
- Carry out a brief ride following calibration to make sure that the power data appears typical and consistent.
- Watch the power readings while riding to verify that they align with what you expect and the source of data.
Monitor Your Power Data
Power Metrics
Another important information piece from your Stages Power Meter is power metrics which include average power, normalized power, and power balance. Average power reflects your overall effort, normalized power addresses ride variability, and power balance shows how strongly you push with your legs. Learn the meaning of this data for a more targeted training approach.
Real-time Monitoring
Check your cycling computer or app while riding to see power data in real time. A consistent power output is key to successful training or racing. For example, if you know you want to average 200 watts during your entire time trial effort, tracking your power via a cycling computer will help you to keep it consistent.
Post-ride Analysis
After the ride, check your power data to review your performance. Apps like TrainingPeaks or Strava offer in-depth metrics and trends. Check for some patterns like your power output capacity is increasing, or you consistently drop power in the same areas. This information will help you correct your training plan.
Power Zones
Divide power zones according to your FTP, or the highest power you can sustain for an hour. Calculate your training zones from zone 1 to zone 6, where power ranges from simple recovery rides to high-intensity efforts. Monitor your time spent in each zone to avoid overtraining.
Progress
Continue to track your power with each subsequent ride. Make it a goal to improve FTP, a common marker of performance. For example, try to improve your FTP by 5% over three months. Use power information to help to reach this goal.

Maintain Your Power Meter
Regular Cleaning
To ensure that your Stages Power Meter continues to operate properly, you must clean its components at regular intervals. Additionally, after each ride, use a soft fabric and mild soap to clean the power meter and crank arm. Furthermore, do not utilize high-pressure water or strong chemicals since it may damage the sensitive electronics.
Battery Replacement
A Stages Power Meter’s battery will endure around 200 hours of riding. As a result, you will want to check how frequently you used it, and when necessary, replace the battery. You will need a CR2032 coin cell battery to change the battery. Additionally, open the battery compartment cautiously, swap out the old battery, and make sure the new battery is secure in place.
Firmware Upgrades
You may download firmware updates from time to time. Stages Cycling updates regularly to enhance precision and introduce new features. Consequently, it should be linked to required applications for this task. Additionally, regular upgrades to the firmware ensure that your power device functions at its maximum capacity.
Examine for Damage
Inspect your power meter for any cracks, loose components, or water damage from time to time. Strive to accomplish this shortly after a session in bad weather conditions or after heavy rain. Prevent further harm by taking prompt action.


