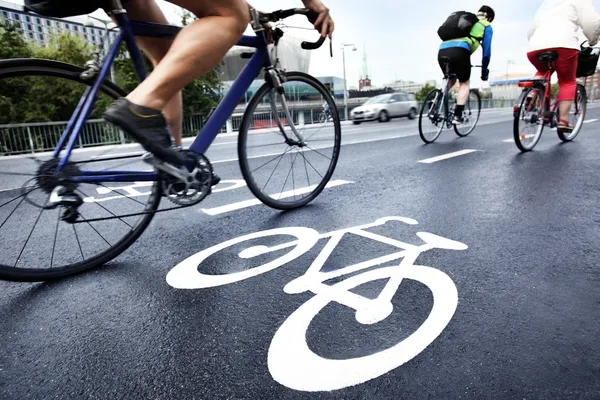
Add a power meter to your bike in five steps: select the type, budget, install using specific tools, set up with your device, and calibrate regularly for accuracy.
Choose the Right Type
Overview of Power Meter Types
The type of power meter you use is the most critical factor in collecting reliable and actionable cycling data. Primarily, you may focus on three types of power meter: pedal-based, crank-based, and hub-based systems. Given the type of metrics you want to track and the style of cycling you do, each of these types has certain priorities.
Pedal-Based Power Meters
power-based pedal meters are easy to install and interchangeable between track and road bikes. This type of meter contains sensors that gauge the force corresponding to your foot strength. In general, this kind is popular among cyclists who have two or more bicycles, as it takes little time to install the meter in a few minutes.
Crank-Based Power Meters
The second type of power meter is in the crank. The sensor is integrated into the crank arm to the spider, which connects the crank arms with the chainrings. The crank power meter is best known for its precision and resistance to environmental and altitude instability. It is suitable for cyclists who train in challenging conditions and need exact readings.
Hub-Based Power Meters
you can use hub meters in the last type of meter is measured by a rear wheel hub. This design is strong and resistant to weather conditions and path instability. Hub meters show your power output with extreme precision. However, this type of power meter is challenging to install and is not suitable for frequent use on different bikes.

Budgeting for Your Power Meter
Setting a budget for your power meter is one of the initial steps that ensures you buy a product that satisfies your performance requirements as well as someone that is within your affordable range. The price of the power meter varies, depending on the type of power meter, feature, and meter precision. For that reason, understanding these dynamics will allow you to make a wise investment in line with the objectives of your cycling training and your budget.
Price Range and Types
Power meters have a wide range of prices, which can run anywhere from $300 to well over $1000. That includes a broad spectrum of both high-end and low-end power meters. Pedal-based power meters tubes tend to be the middle to higher end of this price range due to their adaptability and convenience. Crank-based power meters have a wide price range depending on how integrated they are—power meters that include both cranks arms and a spider tend to cost slightly more. Wheel hub power meters tend to be on the higher end of price as they tend to be more durable and accurate.
Cost Considerations
Additionally, consider the cost against the characteristics of the power meter. Dual-sided models are pricier than one-sided ones, but they provide increased information about your pedaling efficiency and the necessity to produce power. Dual-sided models measure the uneven power from each pedal and double the value.
Additional Costs
Consider also the extra expenses such as installation cost if you are not the one installing it and other costs such as maintenance, updating the power meter firmware. Some power meters require specific installation tools and regular recalibration. In the event of a power meter which is this case you may be faced with purchasing certain equipment.
Installation Essentials
Although installing a power meter on your bike may require some technical skill, you can accomplish it hassle-free if you have the necessary tools and understand the steps involved. The following detailed guide will take you from the tools you need to ensure that everything is well set up to be getting accurate data in no time.
Tool Requirements
ensure you have all the tools required. Most power meters use different Allen wrenches, a torque wrench to make sure that your components are tightened the way the manufacturer wanted them to be, and possibly a crank puller or chain whip if you are installing a crank-based or hub-based power meter. Use the installation manual that comes with your power meter to ensure that you have the correct tools.
Installing Different Types of Power Meters
Installing a power meter is relatively similar; however, the installation is a bit different for each type: pedal-based power meters are the simple swapping of your current pedals with the power meter pedals. Remove your current pedals using an allen wrench or pedal wrench and change the pedals. Make sure you use a torque wrench to apply the right amount of torque to avoid damage. Crank-based power meters require the removal of your bike’s current crankset. Remove it using the correct tools, which may require a crank puller, and attach the new crankset to your bike. Use an alen wrench and a torque wrench to ensure that each bolt is tightened according to the power meter’s instructions. Hub-based power meters require a rear wheel removal, replacing the hub.

Setting Up and Calibration
Once installed, the next steps are crucial to making sure that it is set up correctly and well-calibrated to accurately provide the data you need. This stage involves setting up your cycling computer to recognize the power meter and doing an initial calibration to give the baseline for its future measurements.
Pairing with Devices
the device has to be paired with a cycling computer or smartphone application. Most power meters support Bluetooth or ANT+ connection which is available in most smartphones, make sure your device has one of those precedents to connect. Pairing most commonly is done by starting the sensor search on the device and selecting your power meter from the list of available devices.
Calibration Process
Then make sure your power meter is calibrated. It is essential as the power meter has to read accurately. Most models have a procedure of a zero-offset calibration, which determines the zero line of power measurement. This is done by making no forces on pedals and choosing the calibrate option on a cycling computer. The device might require doing that on a regular basis, but anything above that will be automatically saved by a device itself.
Adjusting Settings
The settings are also necessary to adjust them by your needs. Here the power zones can be set into your computer, depending on your physiological age, gender, and your targets. Those elements are normally adjustable in cycling computer settings. There, in the settings, you can also see an estimate of the calories you spend during a ride, your current power, the power split on legs in dual systems, and in general, any data your power meter is able to eye.
Conducting a Test Ride
Then, make a test ride for your power gauge device. It is necessary to make sure the device is reading your output adequately. Make sure that there are no gaps in the outputs, no drastic changes in readings, no left-right readings in dual gauges. If anything seems out of range, consider recalibrating the gauge and doing a lap test check. For a more precise investigation, consult manufacturers’ troubleshooting guides or consider professional help.
Testing and Using Your Power Meter
After installation and setup, you are all set to test your power meter device thoroughly and incorporate it into your training plan. This is an essential phase that will help you confirm that the power meter is reading correctly and teach you how to use the readings to improve your cycling performance.
Riding with a Power Meter
For your first ride, you should test different intensities and terrains. It is vital to confirm that the power meter functions in various cycling conditions. You will want to test whether the power reading goes up and down as you prepare to climb or descend. You should also be able to see if the power readings stabilize quickly as your efforts drop or elevate. Additionally, this opportunity will allow you to learn how to read and interpret real-time power data from your device.
Analyzing Your Power Meter Data
After your ride, review the files from your data device. It is crucial to confirm that the power readings were consistently steady when making efforts and see how the power meter reacts to abrupt variations in pedaling force. You will also want to access the power data using either software or apps and confirm the interpretations of your performance using average power, normalized power, and variability index.
Implementing Data into Your Training
You can use the power meter data to plan your training sessions better. Determine your power thresholds and your training zones that will allow you to perform targeted training to boost your fitness levels. Regularly interpret your power data to control the intensity of your efforts, determine the correct zones of training, prevent overtraining.
Regular Calibration Checks
Regularly calibrate your power meter to ensure the precision of the measurements taken by the device. Depending on your model, you may need to do a zero-offset calibration every ride. You will need to recalibrate it if there is a significant change in temperature or altitude as these factors may alter your power readings.


